
Recently I decided to modify lint options for some projects so that my build would fail if I was missing a content description on Images. I ran into a few interesting items that weren’t documented, so I’ll share them here. Ultimately I knew that my task had 2 components:
- Change the accessibility ContentDescription lint warning to an error
- Force my build to fail if there is a lint error
Change Lint Warning to Error
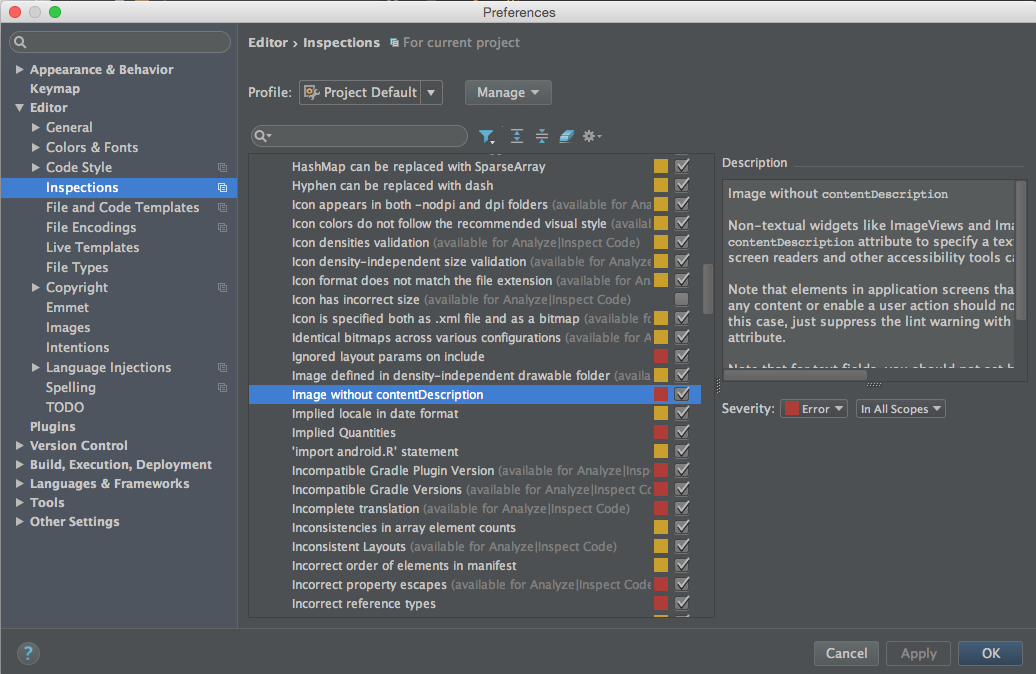
The Android Studio documentation for lint configuration, found here, show for the most part how you can change the severity of all lint items. First off, their directory path is outdated. To get to lint settings is now : Android Studio –> Preferences –> Editor –> Inspections (currently on Android Studio). Once you are there you can update severity of any items. I found the item “Image without contentDescription” and changed it to Error:
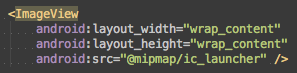
I was excited to see that it “worked”, as my ImageView without contentDescription turned from the yellow highlight of a lint warning:
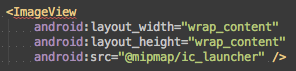
to the red squiggles of an error:
Force Build to Fail
The next step was to force the build to fail if it encountered any lint errors. This can be done in your module-level build.gradle file. Add the following lintOption inside your android closure.
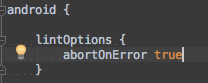
A list of all the possible lintOptions can be found here.
Next, I hit the build button, and was very sad to see that my build passed successfully, even though I had that error being called out in my xml file! What was going on?
It turns out that building with the green play button on Android Studio does not run lint by default. Lint was not being run, so no lint errors were thrown. In fact, hitting the green play button runs this specific gradle task: assembleDebug. This task puts together the debug version of your app, but does not run any unit tests or lint checks. I had previously thought that the play button ran the gradle task build which includes release and debug assembly, as well as tests and lint check. So now I know I need to run command line gradle build if I want to check my lint error. Unfortunately, my build still passed! This time, I found it was a bug in the Android Studio GUI.
I recalled from the days of Eclipse that lint severity levels were controlled by a lint.xml file, and figured this is probably still true for Android Studio. I read through the documentation again and found this line:
If you are configuring lint preferences in Android Studio, the lint.xml file is automatically created and added to your Android project for you.
Great! So, I was right, I do need a lint.xml file. While GUI’s sometimes make your life easier, they are not to be trusted completely because they occasionally lie to you. This is a great example! The GUI was updating the settings for my lint error and even giving graphical feedback on my ImageView xml code that it was in fact an error, but the GUI had actually never created the lint.xml file.
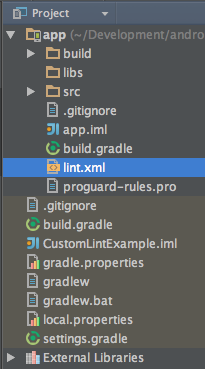
I decided to manually create a lint.xml file. The file belongs at the top level of your module (not the whole project), like this:
Next I had to figure out the official xml item name of the lint item I was trying to configure. Unfortunately, the GUI listing doesn’t include the official name of the items. I found this handy list of all lint checks. I also learned you could run lint –list on the command line to get an output of all lint options.
After adding in the lint.xml file and and doing a gradle build I was finally able to fail my build on a lint error. Yay!
Though it slows the dev cycle a lot, you can enable lint to be run when you click on the green play button.
Clicking on the dropdown next to the button, or from the Run toolbar menu, you can Edit Configurations. From there, select your default run configuration (“app” or “mobile”, or whatever your android module is called, unless you created your own configuration) and you can add a step for “Before launch” in the right pane.
“Before launch” already includes “Gradle-aware Make”, you can add “Run Gradle Task”, selecting your app module for Gradle Project and “lint” as the task name.
Great tip! Thank you!
Pingback: How Do We Configure Android Studio to Run Its Lint on Every Build? - BlogoSfera
Pingback: 2015 Recap | KioDev
add
“`
afterEvaluate {
tasks.assembleRelease.dependsOn tasks.lintRelease
}
“`
to your module build.gradle so that you won’t be having extra development overhead but you will catch before you release a build.
If you are particular in catching them when you build while debugging then add
“`
afterEvaluate {
tasks.assembleDebug.dependsOn tasks.lintDebug
tasks.assembleRelease.dependsOn tasks.lintRelease
}
“`
instead.
Nice Manideep. It helped and worked for me.